
一步一步学习使用LiveBindings(5) 使用TAdapterBindSource实现对象绑定
一步一步学习使用LiveBindings(5) 使用TAdapterBindSource实现对象绑定
在本系列的第1课介绍过TBindSourceDB绑定到TFDMemTableo数据库组件,也介绍了使用TPrototypeBindSource提供样本数据源。接下来看一个新的BindSource组件TAdapterBindSource,如其名所暗示,它是一个桥接器绑定控件,主要用来将自定义的对象与数据源进行绑定。
TAdapterBindSource有一个Adapter属性,它可以接收一个继承自TBindSourceAdapter的组件。Delphi提供了TDataGeneratorAdapter组件,它可以完成类似TPrototypeBindSource组件所完成的工作:定义字段列表,关联数据生成器。
好了,有深度的话不多说了,开始练习吧,打开Delphi 12.3。
1. 单击主菜单中的 File > New > Multi-Device Application - Delphi > Blank Application ,创建一个新的多设备应用程序。
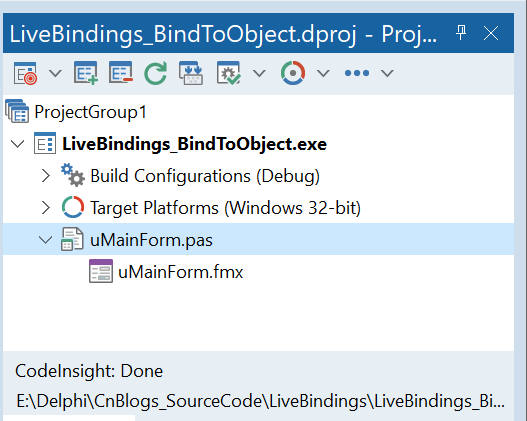
建议立即单击工具栏上的Save All按钮,将单元文件保存为uMainForm.pas,将项目保存为LiveBinding_BindToObject.dproj。
你的项目结构应该像这样:
2. 从工具面板,拖如下的控件到主窗体。
- TAdapterBindSource —— 通过它来完成控件绑定操作。
- TDataGeneratorAdapter —— 通过它来产生设计时的测试数据。
- TBindNavigator —— 将为示例数据提供导航功能。
- TGrid —— 将显示某些信息。
简单布局一下之后,界面显示效果如下图所示。

3. 创建一个新的Delphi单元,构建将要被绑定的数据对象。可以在Project Manager右击项目名称,选择 Add > New > Unit 菜单项,新建一个单元文件,将该单元另存为“EmployeeAdaptee.pas”,然后将下面的代码敲进去。
unit EmployeeAdaptee; interface type TEmployee = class(TObject) private FFirstName: String; //员工姓 FLastName: String; //员工名 FAge: Byte; //年龄 FStartDate: TDate; //入职日期 FPosition: String; //职位 FManager: String; //所属经理 public /// <code> /// 构造函数 /// </code> constructor Create(const AFirstName, ALastName: String; const AAge: Byte; const AStartDate: TDate; const APosition, AManager: String); overload; property FirstName: String read FFirstName write FFirstName; property LastName: String read FLastName write FLastName; property Age: Byte read FAge write FAge; property StartDate: TDate read FStartDate write FStartDate; property Position: String read FPosition write FPosition; property Manager: String read FManager write FManager; end; implementation { TEmployee } constructor TEmployee.Create(const AFirstName, ALastName: String; const AAge: Byte; const AStartDate: TDate; const APosition, AManager: String); begin inherited Create; FFirstName := AFirstName; FLastName := ALastName; FAge := AAge; FStartDate := AStartDate; FPosition := APosition; FManager := AManager; end; end. 4. 回到主窗体,按F12切换到代码视图,再按下Alt+F11快捷键,在弹出的窗口中选中EmployeeAdaptee.pas,指定将该单元添加到Interface区中。
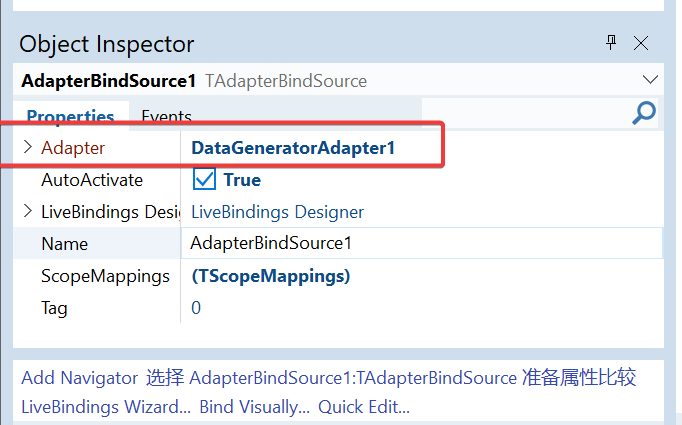
如果现在切换到LiveBindings Designer设计器,在AdapterBindSource1项中是看不到有任何字段的,为了添加设计时的支持,接下来将AdapterBindSource1的Adapter指向DataGeneratorAdapter1。
5. 选中AdapterBindSource1,指定其Adapter属性为DataGeneratorAdapter1。
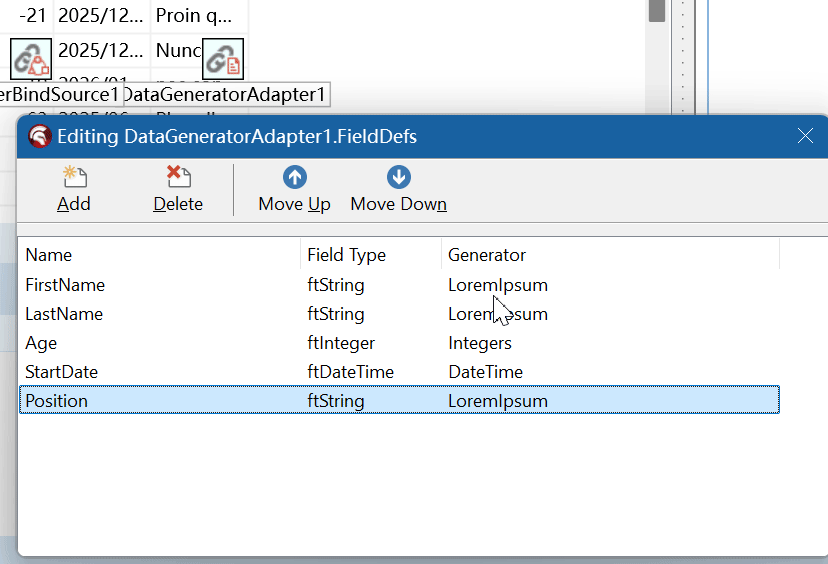
6. 右键单击DataGeneratorAdapter1,从弹出的菜单中选择“Fields Editor”菜单项,在弹出的对话框中,单击“Add”按钮,在弹出的对话框中可以看到有很多包含FieldData生成器的字段,也有很多是Generator为(none)类型的不包含生成器的字段。在名称文本框中会自动生成Field开头的字段,依次添加如下图所示的字段:
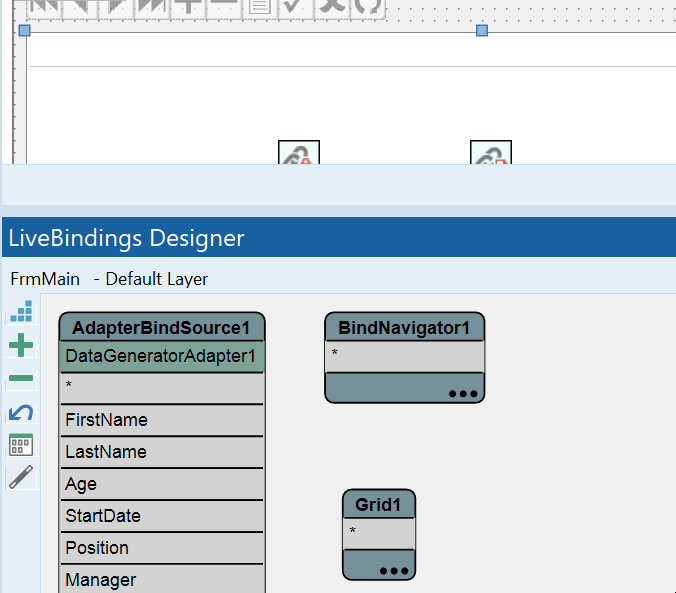
7. 现在,如果进入到LiveBindings Designer设计器,可以看到AdapterBindSource1实体中包含了多个字段,这个时候可以通过拖拉的方式来设置绑定。
由于在添加字段时,指定了具体的字段数据生成器,因此在绑定后,就可以在Grid上看到测试数据。
8. 接下来需要通过一个事件,来将雇员信息添加到数据绑定中去,请选中AdapterBindSource1组件,然后在属性编辑器中,切换到Events选项卡,双击OnCreateAdapter事件,Delphi将生成骨架代码,然后将如下的代码添加进来。
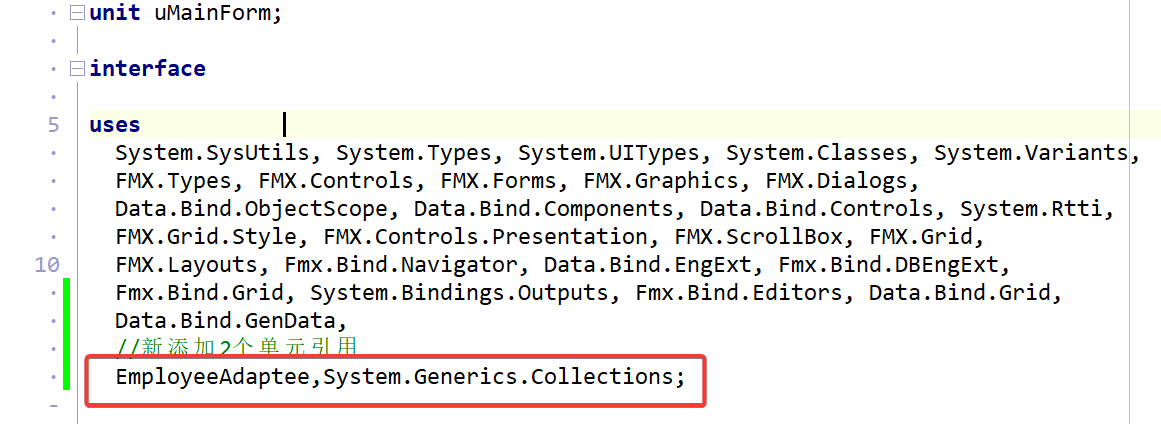
首先,在Interface的Uses区中添加如下的引用,在第4步已经添加了EmployeeAdaptee,接下来需要添加泛型集合类的引用。
接下来需要在private区添加一个集合变量。
type TFrmMain = class(TForm) AdapterBindSource1: TAdapterBindSource; DataGeneratorAdapter1: TDataGeneratorAdapter; BindNavigator1: TBindNavigator; Grid1: TGrid; BindingsList1: TBindingsList; LinkGridToDataSourceAdapterBindSource1: TLinkGridToDataSource; private { Private declarations } //定义一个集合类 FMyEmployee: TObjectList<TEmployee>; public { Public declarations } end; FMyEmployee将会作为对象数据绑定到TGrid上。
接下来添加OnCreateAdapter事件处理代码:
procedure TFrmMain.AdapterBindSource1CreateAdapter(Sender: TObject; var ABindSourceAdapter: TBindSourceAdapter); begin //创建员工集合 FMyEmployee := TObjectList<TEmployee>.Create(True); //创建单个员工并添加到集合 FMyEmployee.Add(TEmployee.Create('Gomez', 'Addams', 40,Now-365*10,'Software Engineer','Alex')); FMyEmployee.Add(TEmployee.Create('Morticia', 'Addams', 38,Now-365*10,'Software Engineer','Alex')); FMyEmployee.Add(TEmployee.Create('Pugsley', 'Addams', 8,Now-365*10,'Software Engineer','Alex')); FMyEmployee.Add(TEmployee.Create('Wednesday', 'Addams', 12,Now-365*10,'Software Engineer','Alex')); // 可以使用TObjectBindSourceAdapter指定单个对象, // 示例使用TListBindSourceAdapter指定集合对象。 ABindSourceAdapter := TListBindSourceAdapter<TEmployee>.Create(Self, FMyEmployee, True); end; 在OnCreateAdapter事件中,ABindSourceAdapter将被用来生成AdapterBindSource1所使用的真实的数据,示例使用TListBindSourceAdapter类创建了一个TObjectList
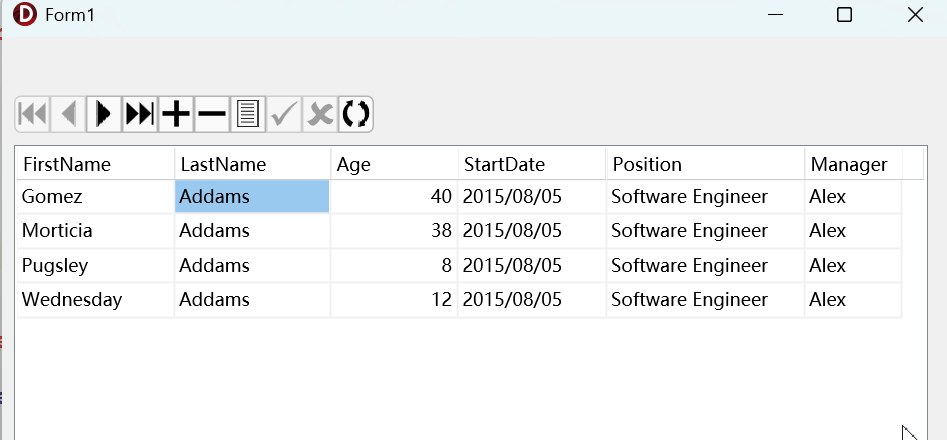
7. 现在就完成了所有的工作,万事皆备,只欠一Run了,按下F9,或者是主菜单的“Run > Run”菜单项,可以看到,果然现在Grid显示了在OnCreateAdapter事件中创建的员工列表。
好了,非常漂亮。
虽然本系列已经写到第5课,但是离真实应用仍然还是有一定的距离,不要着急,只要跟着本系列一步一步的学,很快就能掌握到LiveBindings的精华。


评论