


项目源地址:saicaca fuwari
我实现的效果:https://bxgldh.github.io/
挑模板挑了很久,个人认为原博主的这个模板非常好看O(∩_∩)O。
但是由于我是小白,在上手初期看到博主github上的步骤时,有点懵也踩了不少坑,于是乎就有了这篇文章。
我会尽量保姆式的教学如何搭建一个这样的博客,可能对新手会相对友好一些~
前言
这个网站的实现,主要使用到的是:
Github的Pages服务,它能够将我们托管在名为username.github.io仓库下的前端代码渲染成静态的页面。在完成部署后,我们就可以直接在https://www.username.github.io访问我们的博客。
ps:这里的username指的是你的GitHub账号的用户名,必须完全一致哈
Astro是一个现代化的 静态网站生成器,专为构建快速、内容驱动的网站而设计(如博客、文档站、营销页面等)。
除此之外我们还会用到Github的Actions服务,它允许你通过编写工作流(Workflow)脚本,自动完成代码测试、构建、部署等任务。在我们推送代码到 main 分支后,会自动将静态网页部署到 GitHub Pages。
准备工作
(适用于Windows系统)
在开始之前,需要先安装一些工具:
Node.js、npm、pnpm、Git
除此之外,我们需要有一个Github账号,网上有很多注册账号的方法,Github也是非常好用的开源代码仓库,具体如何注册不再赘述。
下载Node.js,npm
参考来源: GitHub+Hexo 搭建个人博客
npm 是 Node.js 的包管理器,安装 Node.js 时会自动安装 npm。
我们在Node.js官网下载LTS版本。
下载后,默认安装,之后打开cmd命令行工具,输入
node -v 安装成功后,会显示版本。这里我的版本是:v22.17.0
npm -v 显示npm版本,我的版本是:10.9.2
下载Git
Git可以帮助我们实现GitHub仓库的代码到本地的克隆,以及之后的上传
Git官网
下载完成后,默认安装。
我们使用右键可以发现可以直接看到Git的帮助栏,有Open Git Bash Here的选项。通过它我们就可以在对应的目录下换出git的命令行工具
本地部署
之后我们点开saicaca fuwari的项目地址
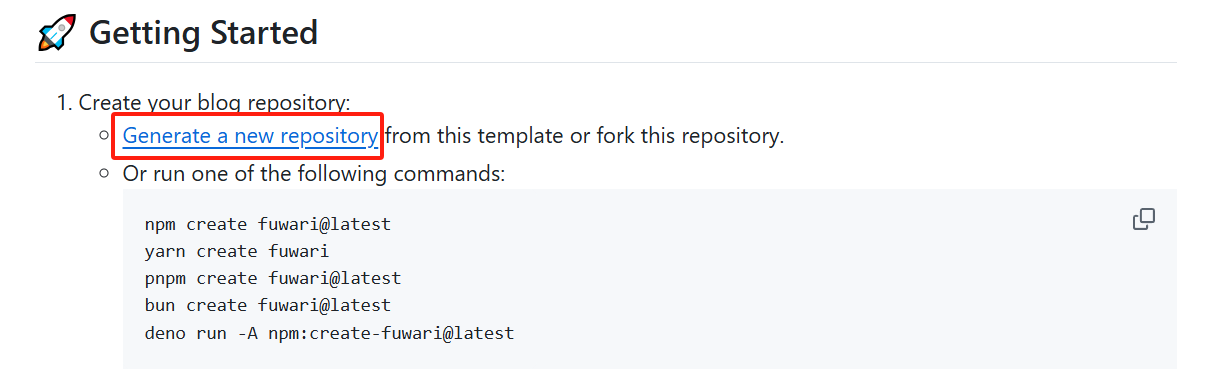
点击Generate a new repository,在Repository name下填入username.github.io,之后点创建仓库。
自己定一个地方,新建一个文件夹,在该路径下进入cmd
使用git把我们创建好的仓库克隆到本地
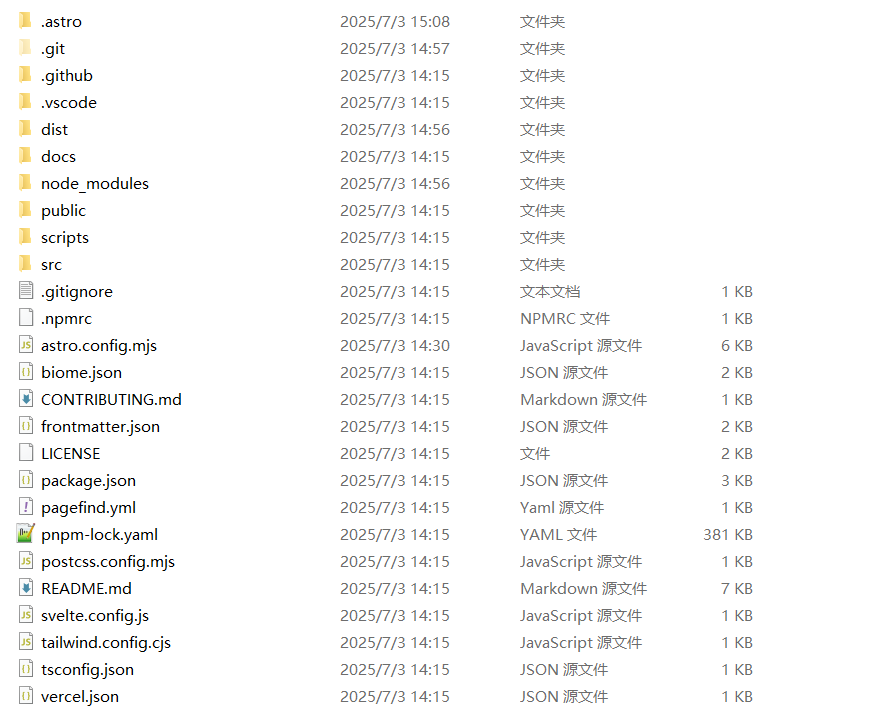
git clone https://github.com/username/username.github.io.git 可以看到已经把项目拉取到本地了
在这个文件夹下右键打开Git Bash
运行
// 下载pnpm npm install -g pnpm // 安装项目的依赖 pnpm install 下载完成后,在Git Bash下运行
pnpm dev 浏览器访问http://localhost:4321/即可看到本地部署的模板
Home页面
- 打开
src/config.ts文件,修改对应的内容即可修改博客页面
博客
- 在src/content/posts下新建md文件,即可添加博客
- markdown的常见用法可以查看下一篇博客
- 在头部加入了浏览量
- 加入了评论、表情功能(giscus组件)
文章浏览量实现方法(不蒜子插件)
在src/pages/posts/[...slug].astro中的word count and reading time模块的最后加入
<!-- 新增阅读量统计 --> <div class="flex flex-row items-center"> <div class="transition h-6 w-6 rounded-md bg-black/5 dark:bg-white/10 text-black/50 dark:text-white/50 flex items-center justify-center mr-2"> <Icon name="material-symbols:visibility-outline-rounded"></Icon> </div> <span id="busuanzi_container_page_pv"><span id="busuanzi_value_page_pv"></span> Page Views </div> 同文件中,添加js脚本
<script async src="https://dn-lbstatics.qbox.me/busuanzi/2.3/busuanzi.pure.mini.js"></script> 实现效果如下:

总站浏览量实现方法(不蒜子插件)
在src/components/Footer.astro的倒数第二个上面加入:
<span id="busuanzi_container_site_pv"><span id="busuanzi_value_site_pv"></span> Total Visits</span> 然后在src\layouts\MainGridLayout.astro的上一行加入:
<script async src="https://busuanzi.ibruce.info/busuanzi/2.3/busuanzi.pure.mini.js"></script> 实现效果如下:

评论功能实现方法
这里主要使用Giscus组件,是一个专门用于评论的工具,所有评论都存储在你对应仓库下的 GitHub Discussions 中。
下面整理一下如何安装和使用
参考来源: 为你的 Astro 博客添加评论功能
- 确保仓库是public状态
- 去到giscus app官网进行安装
- 在仓库中启用discussion功能
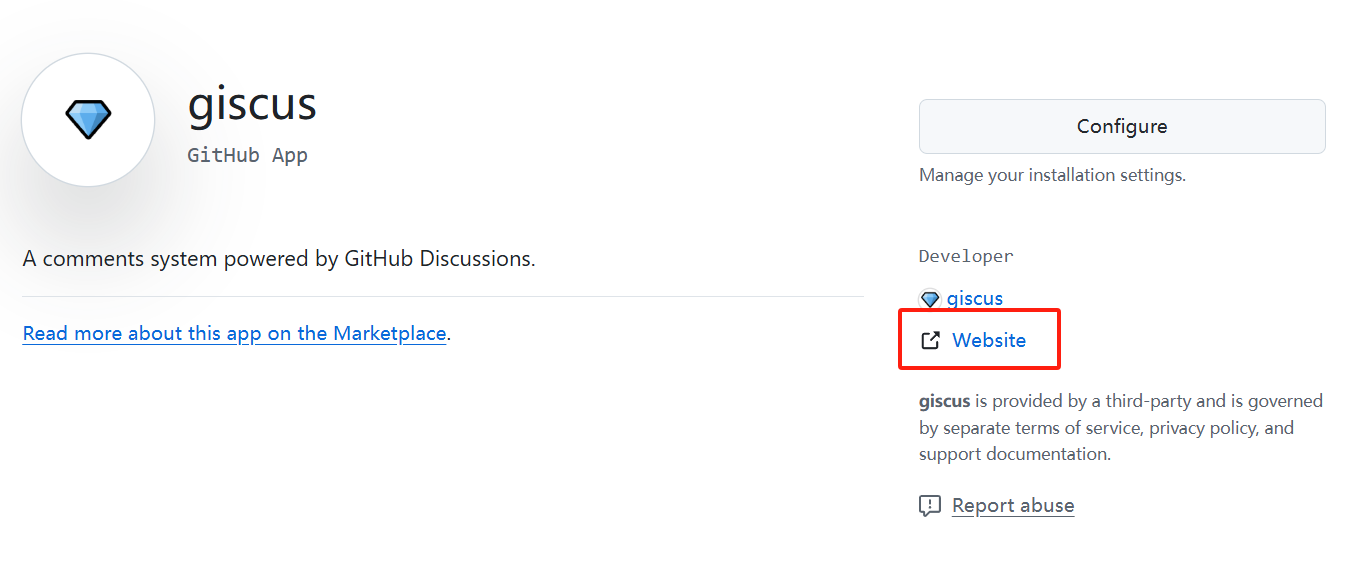
关于giscus app的配置,点击链接后,进行下载。
之后点击 website,
我们需要在repository这一栏填入自己的用户名/仓库名,并选择title
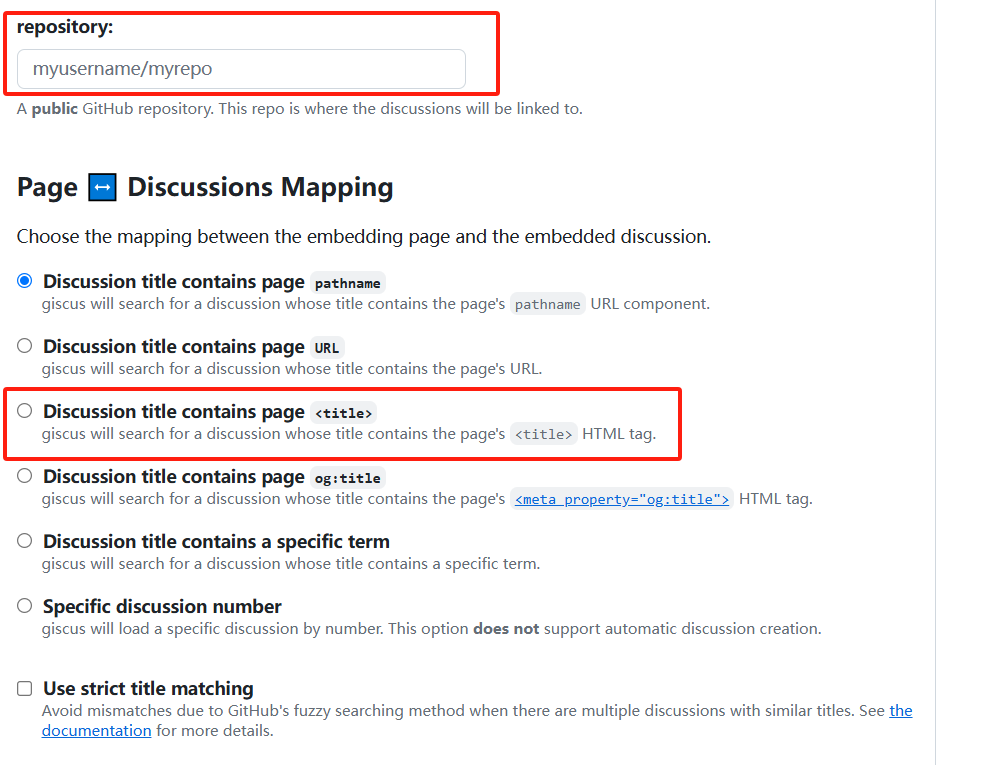
在discussion分类中选择announcements
并启用以下特性:
- reaction
- 评论输入框在上方
- 懒加载
主题那里我并没有修改,到这里参考原博主结束。
我们也需要复制下面自动生成的代码,我在此基础上进行了一定的修改:
<div class="giscus"></div> <script is:inline> // 动态加载以适应主题切换 function loadGiscus() { const theme = document.documentElement.classList.contains('dark') ? 'dark' : 'light'; const script = document.createElement('script'); script.src = 'https://giscus.app/client.js'; script.setAttribute('data-repo', 'Bxgldh/Bxgldh.github.io'); script.setAttribute('data-repo-id', 'R_kgDOPGBMhQ'); // 从giscus.app获取 script.setAttribute('data-category', 'Announcements'); script.setAttribute('data-category-id', 'DIC_kwDOPGBMhc4Cscce'); script.setAttribute('data-mapping', 'title'); script.setAttribute('data-theme', theme); script.setAttribute('data-lang', 'zh-CN'); script.setAttribute('crossorigin', 'anonymous'); script.async = true; document.querySelector('.giscus').appendChild(script); } // 检测主题变化 const observer = new MutationObserver(loadGiscus); observer.observe(document.documentElement, { attributes: true, attributeFilter: ['class'] }); window.addEventListener('load', loadGiscus); </script> 在src/components目录下,新建一个名为Giscus.astro的文件,将上面的代码粘贴进去.
之后来到刚才的src/pages/posts/[...slug].astro文件:
在头部导入
import Giscus from "@components/Giscus.astro"; 然后在src/pages/posts/[...slug].astro主体的markdown class下写
<!-- 评论区域 --> <section class="comments-section mt-12 pt-8 border-t border-gray-200 dark:border-gray-700"> <h2 class="text-2xl font-bold mb-6 pb-4 border-b border-gray-200 dark:border-gray-700 text-gray-900 dark:text-gray-100"> 评论 </h2> <Giscus /> </section> css样式我就直接加了临时的,放到src/pages/posts/[...slug].astro的<MainGridLayout>中任意位置即可
<style is:global> /* 评论区域样式 */ .comments-section { margin-top: 3rem; padding-top: 2rem; border-top: 1px solid var(--border-color); } /* Giscus 容器样式 */ .giscus { margin-top: 1.5rem; min-height: 300px; border-radius: var(--radius-large); overflow: hidden; } /* 暗色模式适配 */ :global(html.dark) .giscus-frame { color-scheme: dark; } </style> 部署到Github
github仓库中,点击settings, Pages, 选择Github Actions
在本地项目中,进入目录.github\workflows,新建一个名为deploy.yml的配置文件,复制如下内容保存:
name: Deploy to GitHub Pages on: # 每次推送到 `main` 分支时触发这个“工作流程” # 如果你使用了别的分支名,请按需将 `main` 替换成你的分支名 push: branches: [ main ] # 允许你在 GitHub 上的 Actions 标签中手动触发此“工作流程” workflow_dispatch: # 允许 job 克隆 repo 并创建一个 page deployment permissions: contents: read pages: write id-token: write jobs: build: runs-on: ubuntu-latest steps: - name: Checkout your repository using git uses: actions/checkout@v4 - name: Install, build, and upload your site uses: withastro/action@v3 # with: # path: . # 存储库中 Astro 项目的根位置。(可选) # node-version: 20 # 用于构建站点的特定 Node.js 版本,默认为 20。(可选) # package-manager: pnpm@latest # 应使用哪个 Node.js 包管理器来安装依赖项和构建站点。会根据存储库中的 lockfile 自动检测。(可选) deploy: needs: build runs-on: ubuntu-latest environment: name: github-pages url: ${{ steps.deployment.outputs.page_url }} steps: - name: Deploy to GitHub Pages id: deployment uses: actions/deploy-pages@v4 若第一次向github仓库push
需要进行以下步骤将本地的ssh密钥存到GitHub账户中。
如果你在不需要科 学sw的地方,可以直接在进行下面第四条命令时,输入GitHub的账户和密码
反之,需要在本地cmd中运行:
ssh-keygen -t ed25519 -C "your_email@example.com" cat ~/.ssh/id_ed25519.pub 这会输出类似这样的内容:
ssh-ed25519 AAAAC3NzaC1lZDI1NTE5AAAAIE...你的用户名@你的电脑名 把这整行复制下来(包括开头的 ssh-ed25519 和结尾的邮箱或用户名)。
之后打开 GitHub,进入你的账号。
点击右上角头像 → Settings(设置)
左侧栏中找到:SSH and GPG keys(SSH 和 GPG 密钥)
点击右上角的绿色按钮 New SSH key
填写:
Title(标题):随便写,比如 "My Laptop" 或 "MacBook SSH Key"
Key(密钥):粘贴你刚才复制的那段公钥内容
点击 Add SSH key 即可
cmd运行以下命令,查看是否成功链接GitHub
ssh -T git@github.com 成功会有如下字样:
Hi your-username! You've successfully authenticated... 反之跳过
继续进行以下步骤
在根目录下启动git bash,依次运行
npm run build git add . git commit -m "第一篇博客" git push origin main 之后访问https://username.github.io/即可
如果这篇文章有帮到你,还请留下一个点赞or评论再走吧~o( ̄▽ ̄)ブ
遇到任何问题,或者发现有错的地方欢迎指正!


这一切,似未曾拥有