


前言:上一篇我们按步骤跑了一遍Baseline也生成了8张故事图片,但是原理啥的都是一头雾水,因为是初学者,所以只能一点点的分析来理解消化。这篇咱们就深入的来了解一下相关的内容。根据内容自己总结理解和查询相关的一些资料。不正确的地方提出来我修改一下。
学习任务
一、AIGC了解与AI生图历程
0、AIGC是什么?
1、AI生图历程(简单了解)
2、AI“味”与“恐怖谷”曲线
3、文生图的模型
4、其它工具
二、精读baseline
0、什么是kolors?
1、什么是baseline?
2、baseline代码详解
2.1. 安装和卸载依赖包
2.2. 加载数据集
2.3. 数据预处理
2.4. 使用 Data-Juicer 进行数据处理
2. 5. 保存处理好的数据
2.6. 训练模型
2.7. 图像生成
2.8. 合并图像
三、Scepter与WebUI:可视化生图
一、AIGC了解与AI生图历程
0、AIGC是什么?
AIGC(AI-Generated Content)笔者单词不好,百度翻译一下就是:AI产生内容。那么也就是我们用AI生成一些东西。产生什么内容很广泛。然后我们这次使用的文生图其实是AIGC的一个小模块,那么我们学习不也是由特例延伸到泛例嘛,所以文生图弄明白了之后在泛化扩展AI产生其它内容。
1、AI生图历程(简单了解)
20世纪70年代,由艺术家哈罗德·科恩发明AARON,可通过机械臂输出作画。画重点机械臂作画
2012年吴恩达训练出的能生成“猫脸”的模型,画重点基于深度神经网络基础上训练生成“猫脸”
2015年,谷歌推出了“深梦”(Deep Dream)图像生成工具,类似一个高级滤镜,可以基于给定的图片生成梦幻版图片,画重点谷歌“深梦”工具
2021 年 1 月 OpenAI 推出DALL-E模型能直接从文本提示“按需创造”风格多样的图形设计
2022年8月,AI生图真正走进了大众的视野,让各个领域无法忽视
2、AI“味”与“恐怖谷”曲线
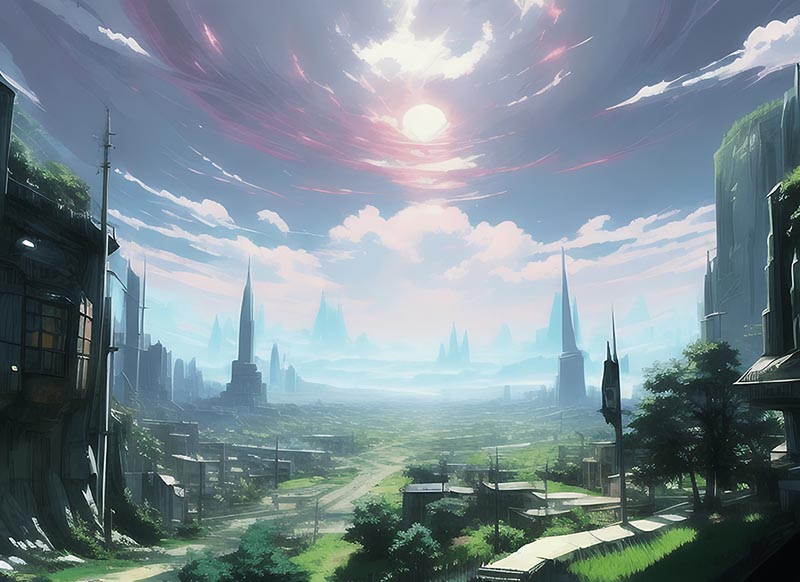
技术在进步,往前一些的时候,AI生成的图片往往与实际不符,也很明显。例如下面图片
我们现在还可以经常在各类自媒体的文章中看到“AI翻车”的案例,那些往往也是需要解决的难点,某些“翻车”现象,也许在业界已有相关的解决方案。
AI味:AI生成的图片和实际生活场景/艺术家创作的绘画/摄影/三维作品 相比,存在强烈的违和感,或是细节处理,或是画面逻辑性存在问题,一言就能被看出是“AI出品”,目前大部分的模型,已经具备了去除 “AI味” 的能力。
AI生图在很长一段时间很难被人们所广泛接纳,一方面是生成的内容没有可用的生产场景,还有很大程度可能是由于“恐怖谷效应”
其核心观点是:随着仿真物(如机器人、玩偶等)模拟真实性程度的变化,人们对其亲和力也会产生变化,一般规律是亲和力随着仿真程度增高而增高,但当仿真程度达到一个临界点时,人的亲和反应会陡然跌入谷底,突然产生排斥、恐惧、困惑等负面心理。
3、文生图的模型
Kolors(可图)模型(点击即可跳转魔搭模型介绍页) 是快手开源的文本到图像生成模型,该模型具有对英语和汉语的深刻理解,并能够生成高质量、逼真的图像。
代码开源链接:https://github.com/Kwai-Kolors/Kolors
模型开源链接:https://modelscope.cn/models/Kwai-Kolors/Kolors
技术报告链接:https://github.com/Kwai-Kolors/Kolors/blob/master/imgs/Kolors_paper.pdf
魔搭研习社最佳实践说明:https://www.modelscope.cn/learn/575?pid=543
过去文生图主要以 SD 系列基础模型为主,仅支持英文的prompt,但可图是支持中文的文生图模型,文生图的prompt格式较为固定,魔搭社区还开源了专门的各种风格的可图优质咒语书(点击即可跳转),可以针对600+种不同风格,完善prompt,生成各种风格图片,可以在我们的学习当中使用
4、其它工具
在某些设计的场景中,我们还希望AI能为我们将特定的文字生成在图片当中,这种固定文字生成,往往难度较大,一是具体生成在哪些位置,往往需要人为设定,为了更方便地制作类似这样的海报还产生了PS等图片编辑工具,才能实现相应的效果,想要让AI稳定生成相似效果的图片可想而知难度之大。
创意海报生成 工具,早已在代码中固定了相应的文字位置和对应的字体,才能进行相应的生成,且大概率是进行了两个步骤——
一个步骤是AI生成背景,
另一个步骤是通过代码将对应的文字显示到对应位置,
然后渲染,合成图片,给到我们。
二、精读baseline
在上一篇文章,准备环境之后我们打开终端之后,下载baseline文件时执行的是这个命令
git lfs install git clone https://www.modelscope.cn/datasets/maochase/kolors.git解释:
安装Git LFS,简单说就是使用git处理大文件的能力
使用git克隆下来kolors项目,好了也就是需要把kolors项目下载到环境里,那kolors项目是啥呢?
0、什么是kolors?
上面第一部分3部分说了,Kolors是快手自研的文生图大模型,旨在基于开放式文本生成各类绘画作品。该模型具有三大突出特点:强大的文本理解、丰富的细节刻画以及多样的风格转化。
Kolors已经在公司内部全面开启测试,支持网页版工具和标准化API两种使用方式,展现了快手在AIGC领域的最新进展。
简单说:kolors可图是快手开发的一款文生图免费开源项目。那和baseline有啥关系?这个项目里有一个baseline.ipynb文件如下图,这个东西就相当于我们开发项目的入口。所以我们要解析这个东西。
1、什么是baseline?
baseline是什么?前面说了,是可图项目下的一个文件,是这个项目的入口。其实到这我还是没理解它到底是个啥,百度了一下。
原来这个东西在各行各业表示的意思不一样,我们书序机器学习吧?按照我的笨理解方式,我觉得它和Jenkins的流水线一样,也和生产线一样,点个按钮按模块执行,最后生产成品,然后整个过程叫baseline,但我不明白我们的文件后缀名是.ipynb文件呀,这是个啥?
这样我们就理解了这事某个ide的文件,也相当于某个语言的文件。用它来编写我们文生图的项目。
2、baseline代码详解
这个IDE的工具和我平时开发用的不太一样,但是没关系,我们能知道代码在哪写和简单的使用就行。
那既然都找到了写代码的地方,我们把代码copy下来分析,偶对了,先来一个架构图吧,头脑要有全局的观念,这样理解就清晰了。
!pip install simple-aesthetics-predictor !pip install -v -e data-juicer !pip uninstall pytorch-lightning -y !pip install peft lightning pandas torchvision !pip install -e DiffSynth-Studio from modelscope.msdatasets import MsDataset ds = MsDataset.load( 'AI-ModelScope/lowres_anime', subset_name='default', split='train', cache_dir="/mnt/workspace/kolors/data" ) import json, os from data_juicer.utils.mm_utils import SpecialTokens from tqdm import tqdm os.makedirs("./data/lora_dataset/train", exist_ok=True) os.makedirs("./data/data-juicer/input", exist_ok=True) with open("./data/data-juicer/input/metadata.jsonl", "w") as f: for data_id, data in enumerate(tqdm(ds)): image = data["image"].convert("RGB") image.save(f"/mnt/workspace/kolors/data/lora_dataset/train/{data_id}.jpg") metadata = {"text": "二次元", "image": [f"/mnt/workspace/kolors/data/lora_dataset/train/{data_id}.jpg"]} f.write(json.dumps(metadata)) f.write("\n") data_juicer_config = """ # global parameters project_name: 'data-process' dataset_path: './data/data-juicer/input/metadata.jsonl' # path to your dataset directory or file np: 4 # number of subprocess to process your dataset text_keys: 'text' image_key: 'image' image_special_token: '<__dj__image>' export_path: './data/data-juicer/output/result.jsonl' # process schedule # a list of several process operators with their arguments process: - image_shape_filter: min_width: 1024 min_height: 1024 any_or_all: any - image_aspect_ratio_filter: min_ratio: 0.5 max_ratio: 2.0 any_or_all: any """ with open("data/data-juicer/data_juicer_config.yaml", "w") as file: file.write(data_juicer_config.strip()) !dj-process --config data/data-juicer/data_juicer_config.yaml import pandas as pd import os, json from PIL import Image from tqdm import tqdm texts, file_names = [], [] os.makedirs("./data/data-juicer/output/images", exist_ok=True) with open("./data/data-juicer/output/result.jsonl", "r") as f: for line in tqdm(f): metadata = json.loads(line) texts.append(metadata["text"]) file_names.append(metadata["image"][0]) df = pd.DataFrame({"text": texts, "file_name": file_names}) df.to_csv("./data/data-juicer/output/result.csv", index=False) df from transformers import CLIPProcessor, CLIPModel import torch model = CLIPModel.from_pretrained("openai/clip-vit-base-patch32") processor = CLIPProcessor.from_pretrained("openai/clip-vit-base-patch32") images = [Image.open(img_path) for img_path in df["file_name"]] inputs = processor(text=df["text"].tolist(), images=images, return_tensors="pt", padding=True) outputs = model(**inputs) logits_per_image = outputs.logits_per_image # this is the image-text similarity score probs = logits_per_image.softmax(dim=1) # we can take the softmax to get the probabilities probs from torch.utils.data import Dataset, DataLoader class CustomDataset(Dataset): def __init__(self, df, processor): self.texts = df["text"].tolist() self.images = [Image.open(img_path) for img_path in df["file_name"]] self.processor = processor def __len__(self): return len(self.texts) def __getitem__(self, idx): inputs = self.processor(text=self.texts[idx], images=self.images[idx], return_tensors="pt", padding=True) return inputs dataset = CustomDataset(df, processor) dataloader = DataLoader(dataset, batch_size=8) for batch in dataloader: outputs = model(**batch) logits_per_image = outputs.logits_per_image probs = logits_per_image.softmax(dim=1) print(probs) import torch from diffusers import StableDiffusionPipeline torch.manual_seed(1) pipe = StableDiffusionPipeline.from_pretrained("CompVis/stable-diffusion-v-1-4", torch_dtype=torch.float16) pipe = pipe.to("cuda") prompt = "二次元,一个紫色长发小女孩穿着粉色吊带漏肩连衣裙,在练习室练习唱歌,手持话筒" negative_prompt = "丑陋、变形、嘈杂、模糊、低对比度" guidance_scale = 4 num_inference_steps = 50 image = pipe( prompt=prompt, negative_prompt=negative_prompt, guidance_scale=guidance_scale, num_inference_steps=num_inference_steps, height=1024, width=1024, ).images[0] image.save("example_image.png") image from PIL import Image torch.manual_seed(1) image = pipe( prompt="二次元,日系动漫,演唱会的观众席,人山人海,一个紫色短发小女孩穿着粉色吊带漏肩连衣裙坐在演唱会的观众席,舞台上衣着华丽的歌星们在唱歌", negative_prompt="丑陋、变形、嘈杂、模糊、低对比度", cfg_scale=4, num_inference_steps=50, height=1024, width=1024, ) image.save("1.jpg") torch.manual_seed(1) image = pipe( prompt="二次元,一个紫色短发小女孩穿着粉色吊带漏肩连衣裙坐在演唱会的观众席,露出憧憬的神情", negative_prompt="丑陋、变形、嘈杂、模糊、低对比度,色情擦边", cfg_scale=4, num_inference_steps=50, height=1024, width=1024, ) image.save("2.jpg") torch.manual_seed(2) image = pipe( prompt="二次元,一个紫色短发小女孩穿着粉色吊带漏肩连衣裙坐在演唱会的观众席,露出憧憬的神情", negative_prompt="丑陋、变形、嘈杂、模糊、低对比度,色情擦边", cfg_scale=4, num_inference_steps=50, height=1024, width=1024, ) image.save("3.jpg") torch.manual_seed(5) image = pipe( prompt="二次元,一个紫色短发小女孩穿着粉色吊带漏肩连衣裙,对着流星许愿,闭着眼睛,十指交叉,侧面", negative_prompt="丑陋、变形、嘈杂、模糊、低对比度,扭曲的手指,多余的手指", cfg_scale=4, num_inference_steps=50, height=1024, width=1024, ) image.save("4.jpg") torch.manual_seed(0) image = pipe( prompt="二次元,一个紫色中等长度头发小女孩穿着粉色吊带漏肩连衣裙,在练习室练习唱歌", negative_prompt="丑陋、变形、嘈杂、模糊、低对比度", cfg_scale=4, num_inference_steps=50, height=1024, width=1024, ) image.save("5.jpg") torch.manual_seed(1) image = pipe( prompt="二次元,一个紫色长发小女孩穿着粉色吊带漏肩连衣裙,在练习室练习唱歌,手持话筒", negative_prompt="丑陋、变形、嘈杂、模糊、低对比度", cfg_scale=4, num_inference_steps=50, height=1024, width=1024, ) image.save("6.jpg") torch.manual_seed(7) image = pipe( prompt="二次元,紫色长发少女,穿着黑色连衣裙,试衣间,心情忐忑", negative_prompt="丑陋、变形、嘈杂、模糊、低对比度", cfg_scale=4, num_inference_steps=50, height=1024, width=1024, ) image.save("7.jpg") torch.manual_seed(0) image = pipe( prompt="二次元,紫色长发少女,穿着黑色礼服,连衣裙,在台上唱歌", negative_prompt="丑陋、变形、嘈杂、模糊、低对比度", cfg_scale=4, num_inference_steps=50, height=1024, width=1024, ) image.save("8.jpg") import numpy as np from PIL import Image images = [np.array(Image.open(f"{i}.jpg")) for i in range(1, 9)] image = np.concatenate([ np.concatenate(images[0:2], axis=1), np.concatenate(images[2:4], axis=1), np.concatenate(images[4:6], axis=1), np.concatenate(images[6:8], axis=1), ], axis=0) image = Image.fromarray(image).resize((1024, 2048)) image 开始分析,其实这个分析和我们普通项目的分析一样,脚本分析一样,从上到下执行就可以了。
2.1. 安装和卸载依赖包
这个没什么可说的,写代码的也得需要导包相关的环境吧?使用 !pip 命令来安装或卸载 Python 包
2.2. 加载数据集
from modelscope.msdatasets import MsDataset ds = MsDataset.load( 'AI-ModelScope/lowres_anime', subset_name='default', split='train', cache_dir="/mnt/workspace/kolors/data" )使用 ModelScope 的 MsDataset 类加载名为 AI-ModelScope/lowres_anime 的数据集,并指定子集名称为 default 和分割为 train,缓存目录设置为 /mnt/workspace/kolors/data
2.3. 数据预处理
import json, os from data_juicer.utils.mm_utils import SpecialTokens from tqdm import tqdm os.makedirs("./data/lora_dataset/train", exist_ok=True) os.makedirs("./data/data-juicer/input", exist_ok=True) with open("./data/data-juicer/input/metadata.jsonl", "w") as f: for data_id, data in enumerate(tqdm(ds)): image = data["image"].convert("RGB") image.save(f"/mnt/workspace/kolors/data/lora_dataset/train/{data_id}.jpg") metadata = {"text": "二次元", "image": [f"/mnt/workspace/kolors/data/lora_dataset/train/{data_id}.jpg"]} f.write(json.dumps(metadata)) f.write("\n")- 将数据集中的图像转换为 RGB 模式,并保存到指定目录。
- 创建包含图像路径和文本描述的元数据文件 metadata.jsonl。
- 编写并保存 data_juicer_config.yaml 配置文件,用于后续的数据过滤和处理。
2.4. 使用 Data-Juicer 进行数据处理
data_juicer_config = """ # global parameters project_name: 'data-process' dataset_path: './data/data-juicer/input/metadata.jsonl' # path to your dataset directory or file np: 4 # number of subprocess to process your dataset text_keys: 'text' image_key: 'image' image_special_token: '<__dj__image>' export_path: './data/data-juicer/output/result.jsonl' # process schedule # a list of several process operators with their arguments process: - image_shape_filter: min_width: 1024 min_height: 1024 any_or_all: any - image_aspect_ratio_filter: min_ratio: 0.5 max_ratio: 2.0 any_or_all: any """ with open("data/data-juicer/data_juicer_config.yaml", "w") as file: file.write(data_juicer_config.strip()) !dj-process --config data/data-juicer/data_juicer_config.yaml使用 dj-process 命令根据配置文件对数据进行过滤和处理,生成 result.jsonl 文件。
2. 5.保存处理好的数据
import pandas as pd import os, json from PIL import Image from tqdm import tqdm texts, file_names = [], [] os.makedirs("./data/lora_dataset_processed/train", exist_ok=True) with open("./data/data-juicer/output/result.jsonl", "r") as file: for data_id, data in enumerate(tqdm(file.readlines())): data = json.loads(data) text = data["text"] texts.append(text) image = Image.open(data["image"][0]) image_path = f"./data/lora_dataset_processed/train/{data_id}.jpg" image.save(image_path) file_names.append(f"{data_id}.jpg") data_frame = pd.DataFrame() data_frame["file_name"] = file_names data_frame["text"] = texts data_frame.to_csv("./data/lora_dataset_processed/train/metadata.csv", index=False, encoding="utf-8-sig") data_frame2.6. 训练模型
下载模型
from diffsynth import download_models download_models(["Kolors", "SDXL-vae-fp16-fix"])查看训练脚本的输入参数
!python DiffSynth-Studio/examples/train/kolors/train_kolors_lora.py -h开始训练
提示:
在训练命令中填入--modelscope_model_id xxxxx 以及 --modelscope_access_token xxxxx 后,训练程序会在结束时自动上传模型到 ModelScope 部分参数可根据实际需求调整,例如 lora_rank 可以控制 LoRA 模型的参数量 import os cmd = """ python DiffSynth-Studio/examples/train/kolors/train_kolors_lora.py \ --pretrained_unet_path models/kolors/Kolors/unet/diffusion_pytorch_model.safetensors \ --pretrained_text_encoder_path models/kolors/Kolors/text_encoder \ --pretrained_fp16_vae_path models/sdxl-vae-fp16-fix/diffusion_pytorch_model.safetensors \ --lora_rank 16 \ --lora_alpha 4.0 \ --dataset_path data/lora_dataset_processed \ --output_path ./models \ --max_epochs 1 \ --center_crop \ --use_gradient_checkpointing \ --precision "16-mixed" """.strip() os.system(cmd)加载模型
from diffsynth import ModelManager, SDXLImagePipeline from peft import LoraConfig, inject_adapter_in_model import torch def load_lora(model, lora_rank, lora_alpha, lora_path): lora_config = LoraConfig( r=lora_rank, lora_alpha=lora_alpha, init_lora_weights="gaussian", target_modules=["to_q", "to_k", "to_v", "to_out"], ) model = inject_adapter_in_model(lora_config, model) state_dict = torch.load(lora_path, map_location="cpu") model.load_state_dict(state_dict, strict=False) return model # Load models model_manager = ModelManager(torch_dtype=torch.float16, device="cuda", file_path_list=[ "models/kolors/Kolors/text_encoder", "models/kolors/Kolors/unet/diffusion_pytorch_model.safetensors", "models/kolors/Kolors/vae/diffusion_pytorch_model.safetensors" ]) pipe = SDXLImagePipeline.from_model_manager(model_manager) # Load LoRA pipe.unet = load_lora( pipe.unet, lora_rank=16, # This parameter should be consistent with that in your training script. lora_alpha=2.0, # lora_alpha can control the weight of LoRA. lora_path="models/lightning_logs/version_0/checkpoints/epoch=0-step=500.ckpt" )2.7. 图像生成
torch.manual_seed(0) image = pipe( prompt="二次元,一个大波浪小女孩,在家中阳台上坐着,外面下着雨,双手托着腮,很无聊,全身,黑丝", negative_prompt="丑陋、变形、嘈杂、模糊、低对比度", cfg_scale=4, num_inference_steps=50, height=1024, width=1024, ) image.save("1.jpg")可以生成多个,写多个模块同上代码
- 设置正向提示词,反向提示词,执行次数,图片尺寸
- 设置随机种子,控制图片是否可以重复生成,并将图像保存为 .jpg 文件。
2.8. 合并图像
import numpy as np from PIL import Image images = [np.array(Image.open(f"{i}.jpg")) for i in range(1, 9)] image = np.concatenate([ np.concatenate(images[0:2], axis=1), np.concatenate(images[2:4], axis=1), np.concatenate(images[4:6], axis=1), np.concatenate(images[6:8], axis=1), ], axis=0) image = Image.fromarray(image).resize((1024, 2048)) image- 最后,将生成的多个图像合并成一个大图像,并调整大小。
整个流程涵盖了从数据加载、预处理、特征提取、模型预测到图像生成等多个方面。每一部分都有其特定的功能,共同构成了一个完整的二次元图像处理和生成的工作流。
三、Scepter与WebUI 可视化生图
这里不做过多介绍,后面等熟悉了在过来补充
浅尝功能:魔搭体验网址:https://www.modelscope.cn/studios/iic/scepter_studio
其实如果核心代码掌握了之后,后面的webUI界面就是将核心代码的关键部分替换然后执行变成一个可视化操作的过程
总结
kolpromptjsongit二次元tpu文生图aigcdiffusionclicliptoken图像生成pytorchaml演唱会sdxlappcsvai生成